CUDA
查看本机是否能使用GPU
TensorFlow
tensorflow 1.x
1 | import tensorflow as tf |
tensorflow 2.x
1 | import tensorflow as tf |
测试时若想禁用 GPU
1 | import os |
Refs:
Tensorflow中查看gpu是否可用
检测tensorflow是否使用gpu进行计算
查看tensorflow是否支持GPU,以及测试程序
tensorflow-gpu版禁用GPU
TensorFlow(5):使用tensorflow-gpu版本测试下学习速度,cpu(3分钟) vs gpu(4秒)
PyTorch
pytorch
1 | import torch |
Refs:
pytorch中查看gpu信息
为什么将数据转移至GPU的方法叫做.cuda而不是.gpu,就像将数据转移至CPU调用的方法是.cpu?这是因为GPU的编程接口采用CUDA,而目前并不是所有的GPU都支持CUDA,只有部分Nvidia的GPU才支持。PyTorch未来可能会支持AMD的GPU,而AMD GPU的编程接口采用OpenCL,因此PyTorch还预留着.cl方法,用于以后支持AMD等的GPU。
NVIDIA + 环境变量 desktop
跑计算量大的代码,通过 nvidia-smi 命令查看gpu的内存使用量。
Windows 下需在 path 中添加如下路径 (C:\Program Files\NVIDIA Corporation\NVSMI) 才可以直接在 cmd 中使用 nvidia-smi, nvdebugdump --list, nvidia-smi -h 等命令,最后一个命令用来查看更多使用方式。
1 | λ nvdebugdump --list |
Fan:显示风扇转速,数值在0到100%之间,是计算机的期望转速,如果计算机不是通过风扇冷却或者风扇坏了,显示出来就是N/A;Temp:显卡内部的温度,单位是摄氏度;Perf:表征性能状态,从P0到P12,P0表示最大性能,P12表示状态最小性能;Pwr:能耗表示;Bus-Id:涉及GPU总线的相关信息;Disp.A:是Display Active的意思,表示GPU的显示是否初始化;Memory Usage:显存的使用率;Volatile GPU-Util:浮动的GPU利用率;Compute M:计算模式;
Refs:
windows使用nvidia-smi查看gpu信息
在实际中,我添加的环境变量分别如下:
- 系统变量 Path
1
2
3
4
5
6
7
8
9
10
11
12
13
14
15C:\Program Files\NVIDIA GPU Computing Toolkit\CUDA\v10.1\bin
C:\Program Files\NVIDIA GPU Computing Toolkit\CUDA\v10.1\libnvvp
C:\Program Files (x86)\NVIDIA\Corporation\PhysX\Common
C:\Program Files\NVIDIA Corporation\NVIDIA NvDLISR
C:\Program Files\NVIDIA Corporation\Nsight Compute 2019.4.0\
C:\Program Files\Java\jdk-15.0.1\bin
C:\Program Files\Common Files\Oracle\Java\javapath
C:\Program Files (x86)\Common Files\Oracle\Java\javapath
C:\Program Files\Java\jre1.8.0_271\bin
C:\Program Files\Java\jre1.8.0_271\jre\bin
C:\Windows\System32\OpenSSH\
C:\Program Files (x86)\Bitvise SSH Client
C:\Program Files\Git\cmd - 用户变量 Path
1
2
3
4
5
6
7
8
9
10
11
12
13
14
15
16
17C:\Users\Lenovo\AppData\Local\Anaconda3
C:\Users\Lenovo\AppData\Local\Anaconda3\Library\mingw-w64\bin
C:\Users\Lenovo\AppData\Local\Anaconda3\Library\usr\bin
C:\Users\Lenovo\AppData\Local\Anaconda3\Library\bin
C:\Users\Lenovo\AppData\Local\Anaconda3\Scripts
USERPROFILE%\AppData\Local\Microsoft\WindowsApps
C:\Users\Lenovo\AppData\Local\cmder
PyCharm Community Edition%
C:\Users\Lenovo\AppData\Local\Programs\Microsoft VS Code\bin
D:\Software\mingw64\bin
D:\Software\cmake-3.19.1\bin
D:\Software\opencv\build\x64\vc15\bin
D:\Software\opencv\build_x64_mingw\bin
D:\Software\opencv\build_x64_mingw\install\x64\mingw\bin
D:\Software\opencv\build_x64_mingw\install\include - 系统变量 其他
CLASSPATH:.;%JAVA_HOME%\bin;%JAVA_HOME%\lib\dt.jar;%JAVA_HOME%\lib\tools.jarJAVA_HOME:C:\Program Files\Java\jre1.8.0_271CUDA_PATH:C:\Program Files\NVIDIA GPU Computing Toolkit\CUDA\v10.1CUDA_PATH_V10_1:C:\Program Files\NVIDIA GPU Computing Toolkit\CUDA\v10.1DriverData:C:\Windows\System32\Drivers\DriverDataNVCUDASAMPLES_ROOT:C:\ProgramData\NVIDIA Corporation\CUDA Samples\v10.1NVCUDASAMPLES10_1_ROOT:C:\ProgramData\NVIDIA Corporation\CUDA Samples\v10.1NVTOOLSEXT_PATH:C:\Program Files\NVIDIA Corporation\NvToolsExt\
- 用户变量 其他
PyCharm Community Edition:C:\Program Files\JetBrains\PyCharm Community Edition 2020.3\bin;TEMP:C:\Users\Lenovo\AppData\Local\TempTMP:C:\Users\Lenovo\AppData\Local\Temp
查看CUDA版本
1 | λ nvcc --version |
Refs:
Windows查看CUDA版本
Match TF with CUDA
Tensorflow 从源代码构建
经过测试的构建配置 (第2-4列中的空白说明与同列上一行相同)
| Version | Python | Compiler | 构建工具 | cuDNN | CUDA |
|---|---|---|---|---|---|
| TFGpu 1.0.0 | 3.5 | MSVC 2015 update 3 | Cmake v3.6.3 | 5.1 | 8 |
| TFGpu 1.1.0 | 5.1 | 8 | |||
| TFGpu 1.2.0 | 3.5-3.6 | 5.1 | 8 | ||
| TFGpu 1.3.0 | 6 | 8 | |||
| TFGpu 1.4.0 | 6 | 8 | |||
| TFGpu 1.5.0 | 7 | 9 | |||
| TFGpu 1.6.0 | 7 | 9 | |||
| TFGpu 1.7.0 | 7 | 9 | |||
| TFGpu 1.8.0 | 7 | 9 | |||
| TFGpu 1.9.0 | 7 | 9 | |||
| TFGpu 1.10.0 | 7 | 9 | |||
| TFGpu 1.11.0 | Bazel 0.15.0 | 7 | 9 | ||
| TFGpu 1.12.0 | 7 | 9 | |||
| TFGpu 1.13.0 | 3.5-3.7 | Bazel 0.19.0-0.21.0 | 7.4 | 10 | |
| TFGpu 1.14.0 | MSVC 2017 | Bazel 0.24.1-0.25.2 | 7.4 | 10 | |
| TFGpu 1.15.0 | Bazel 0.26.1 | 7.4 | 10 | ||
| TFGpu 2.0.0 | 7.4 | 10 | |||
| TFGpu 2.1.0 | MSVC 2019 | Bazel 0.27.1-0.29.1 | 7.4 | 10.1 | |
| TFGpu 2.2.0 | 3.5-3.8 | Bazel 2.0.0 | 7.4 | 10.1 | |
| TFGpu 2.3.0 | Bazel 3.1.0 | 7.4 | 10.1 |
Windows 10 下卸载重装
查看 CUDA+cuDNN 的版本
Windows 10
- 进入 CUDA 安装目录, 即
C:\Program Files\NVIDIA GPU Computing Toolkit\CUDA1
2nvcc --version
nvcc -V - 查看 cuDNN, 进入
C:\Program Files\NVIDIA GPU Computing Toolkit\CUDA\v10.0\include\cudnn.h, ctrl+F 检索 CUDNN_MAJOR
Ubuntu
1 | cd ~/Software/cuda-10.? |
或使用 PyTorch 查看
1 | import torch |
Comparison
| Operation System | CUDA | cuDNN | TensorFlow-GPU | Dont work |
|---|---|---|---|---|
| Windows 10 laptop | 10.0.130 | 7.4.1 | tf 2.0.0 | tf 2.1.0 |
| Windows10 laptop* | 10.1.243 | 7.6.5 | tf 2.0.0, 2.1.0 | |
| Windows 10 desktop | 10.1.243 | 7.6.5 | tf 2.1.0 | |
| Ubuntu 16.04/18.04 | 10.0.130 | 7.6.4 | tf 2.1.0, 1.14.0 |
- tensorflow-gpu 2.0.0
- Python 3.6.5 (Anaconda3 5.2.0 64-bit)
- CUDA 10.0 + cuDNN 7.4.1
- tensorboard 2.0.2
- tensorflow-estimator 2.0.1
- tensorflow-gpu 2.0.0
- UPDATE: after cuda 10.1, cudnn 7.6.5
1
2
3
4
5
6
7
8
9>> import tensorflow as tf
C:\Users\Lenovo\Anaconda3\lib\site-packages\numpy\_distributor_init.py:32: UserWarning: loaded more than 1 DLL from .libs:
C:\Users\Lenovo\Anaconda3\lib\site-packages\numpy\.libs\libopenblas.NOIJJG62EMASZI6NYURL6JBKM4EVBGM7.gfortran-win_amd64.dll
C:\Users\Lenovo\Anaconda3\lib\site-packages\numpy\.libs\libopenblas.PYQHXLVVQ7VESDPUVUADXEVJOBGHJPAY.gfortran-win_amd64.dll
stacklevel=1)
2021-01-05 13:24:03.251532: W tensorflow/stream_executor/platform/default/dso_loader.cc:55] Could not load dynamic library 'cudart64_100.dll'; dlerror: cudart64_100.dll not found
>> tf.__version__
'2.0.0'
>> ^Z
- tensorflow-gpu 2.1.0
- Python 3.7.0 (Anaconda3 5.3.1 64-bit)
- CUDA 10.1 + cuDNN 7.6.5
- tensorboard 2.1.1
- tensorflow-gpu 2.1.0
- tensorflow-gpu-estimator 2.1.0
1
2
3
4
5
6
7>> import tensorflow as tf
2021-01-05 16:28:30.524528: I tensorflow/stream_executor/platform/default/dso_loader.cc:44] Successfully opened dynamic library cudart64_101.dll
>> tf.test.is_gpu_available()
WARNING:tensorflow:From <stdin>:1: is_gpu_available (from tensorflow.python.framework.test_util) is deprecated and will be removed in a future version.
Instructions for updating:
Use `tf.config.list_physical_devices('GPU')` instead.
....
注意 TF2.1 在 Win10+ CUDA 10.1+cuDNN 7.6.5 下又出幺蛾子了,
- 安装后会出现一个
ImportError: DLL load failed: 找不到指定的模块的报错,这是因为没有安装 VS2019 的两个组件,不用安装整个 VS2019 community ,只要安装两个就行,即- Microsoft Visual C++ 2015-2019 Redistributable (x64)
- Microsoft Visual C++ 2015-2019 Redistributable (x64)
- 解决方法:在 官网 下载
Visual Studio 2015, 2017 and 2019,即- x86:
vc_redist.x86.exe - x64:
vc_redist.x64.exe
- x86:
第一次测试 TF2.1 是否能用 GPU 时,会卡在 Add to gpu 类似的一个语句处很长时间。我查阅资料据说这是第一次执行的正常情况,耐心等待即可。
我曾试过用 pytorch 检查,但是 pip install pytorch 1.7.{1?0} 之后发现 torch.cuda.is_available() 结果是 False,尝试安装 1.6.0 一直因网络问题报错,所以最后使用了 conda 来安装 1.4.0 ,安装语句为
1 | λ conda install pytorch==1.4.0 torchvision==0.5.0 cudatoolkit=10.1 -c pytorch |
安装过程中尝试了 TF2.1 的测试,成功,随后测试 torch,结果为 True。
CUDA, cuDNN 卸载重装
cuDNN本来就只是将文件拷贝进CUDA的安装目录,故删除即可(卸载CUDA后直接删除整个文件夹也可以)
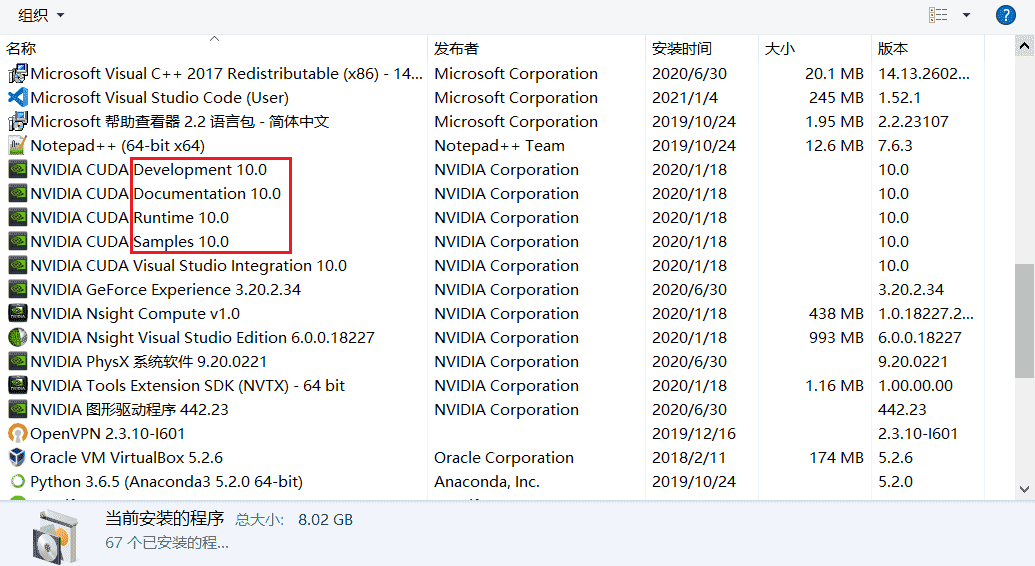
CUDA的卸载:控制面板-卸载程序(不要用360等杀毒软件,找不到对应程序的),按照安装时间排序,最上面这几个带版本号的,就是刚才安装的CUDA了,挨个卸载即可
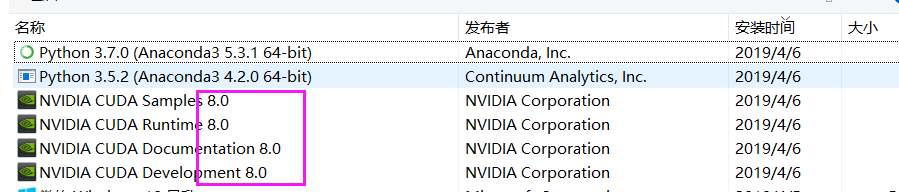
CUDA 10.0 我好像是默认选项装的全部。
所以刚才卸载时把 2020/1/18 安装的所有 NVIDIA 相关全部删了。
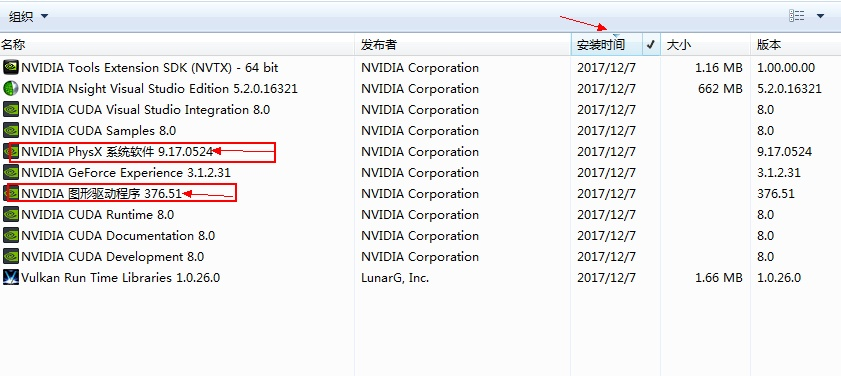
除了这两个 NVIDIA 图形驱动程序 和 NVIDIA PhysX 系统软件 之外,其他都删掉,如图所示
 之后可以清理下注册表,保险起见可以重启,但好像不重启也挺好?
Important!
Windows版本CUDA、CUDNN与英伟达驱动安装教程
Win10中CUDA、cuDNN的安装与卸载
0. Preparation
- (1) 检查 NVIDIA 显卡驱动
检查显卡驱动是否安装及其版本,避免与 CUDA 不兼容而安装失败。- (1a) 在 NVIDIA 官网下载显卡驱动并安装
- (1b) 在桌面点击鼠标右键,打开 NVIDIA 控制面板,界面如下
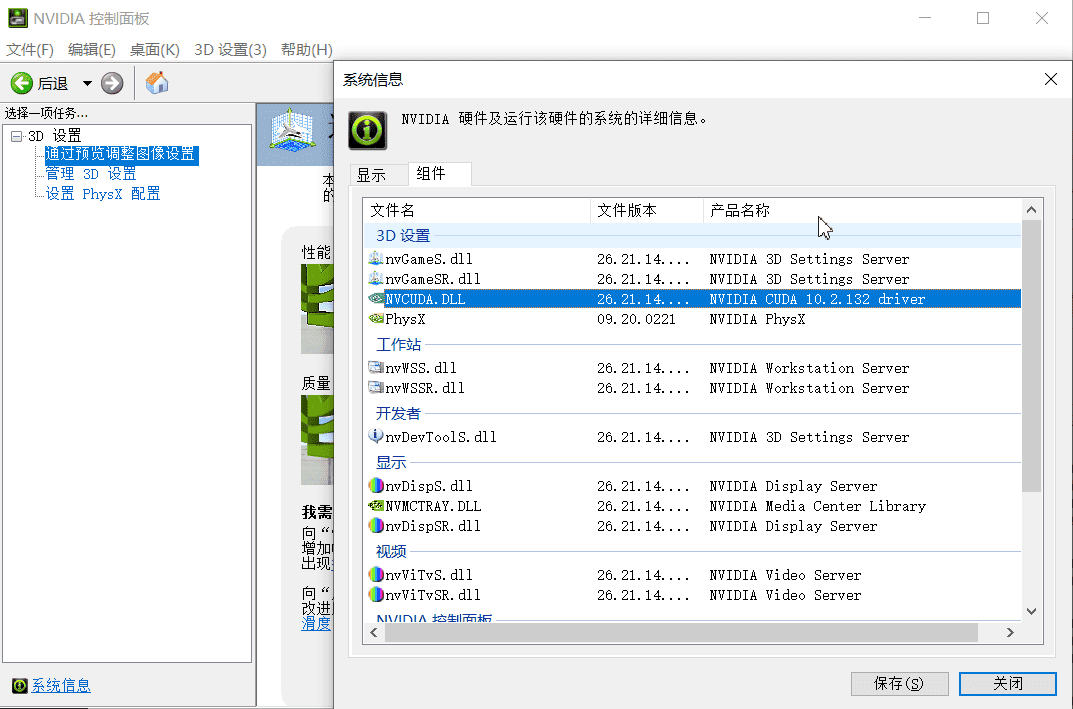 这个代表电脑显卡能支持的 cuda 最大版本
- (2) 下载 CUDA 和 cuDNN
下载相应的 CUDA (包含的 patch 补丁最好全部都下载), 以及对应的 cuDNN (cuDNN 是 CUDA 的扩展加速库,说白了还是补丁), cuDNN 需要注册 NVIDIA 账号。
CUDA: https://developer.nvidia.com/cuda-toolkit-archive
cudnn:https://developer.nvidia.com/rdp/cudnn-download
安装步骤- (2a) 先安装 CUDA,然后按照顺序安装补丁,期间按照提示重启电脑
- (2b) 安装完之后打开 cuDNN,把其中的文件复制到如下文件夹,使得 CUDA 可以调用到 cuDNN 加速库,路径如下 (尽量按照默认,否则文件一乱之后难以管理)
C:\Program Files\NVIDIA GPU Computing Toolkit\CUDA\v10.1\binC:\Program Files\NVIDIA GPU Computing Toolkit\CUDA\v10.1\includeC:\Program Files\NVIDIA GPU Computing Toolkit\CUDA\v10.1\lib\x64 - (2c) 将
C:\Program Files\NVIDIA GPU Computing Toolkit\CUDA\v10.1\bin, 即安装后的 bin 路径添加到环境变量,输入nvcc -V检测安装情况,成功后会提示版本
1. 安装 CUDA
- (4) cuda 安装选项不要选默认的“精简”,因为这是所有的全家桶。
主要是因为里面有一个东西的安装会一直导致安装失败。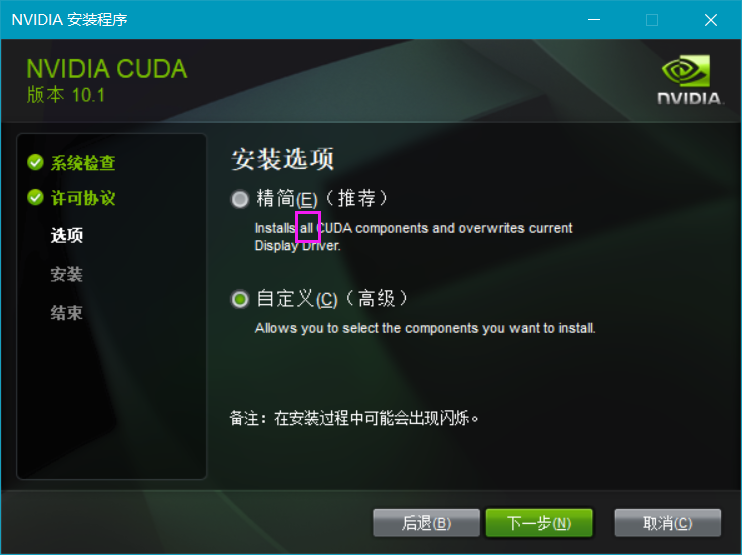 特别是这个 Visual Studio Integration 千万不能选!
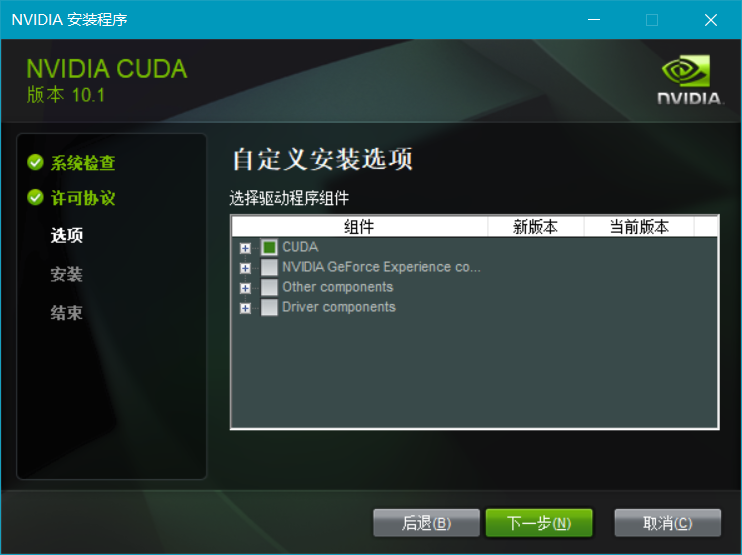
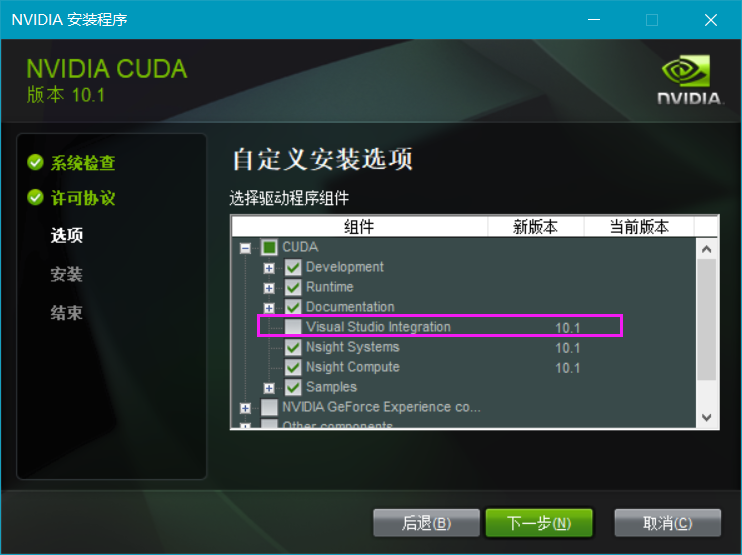 选择以下的安装就够了
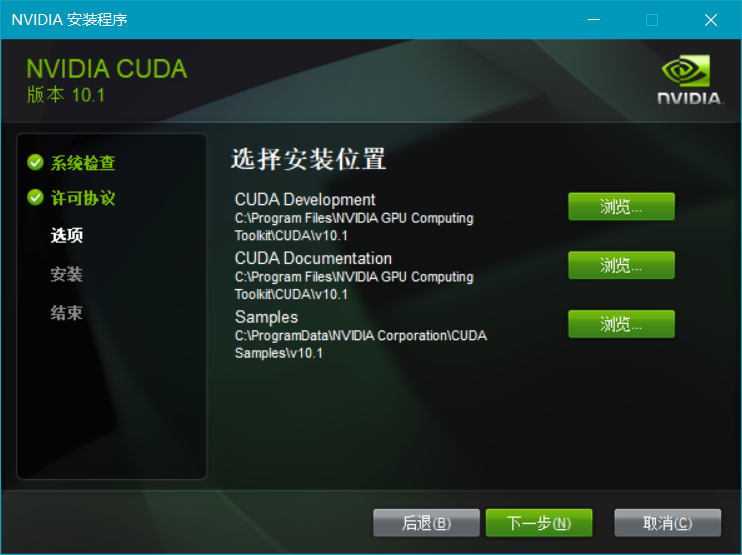
 安装到 C 盘即可,方便以后的路径等
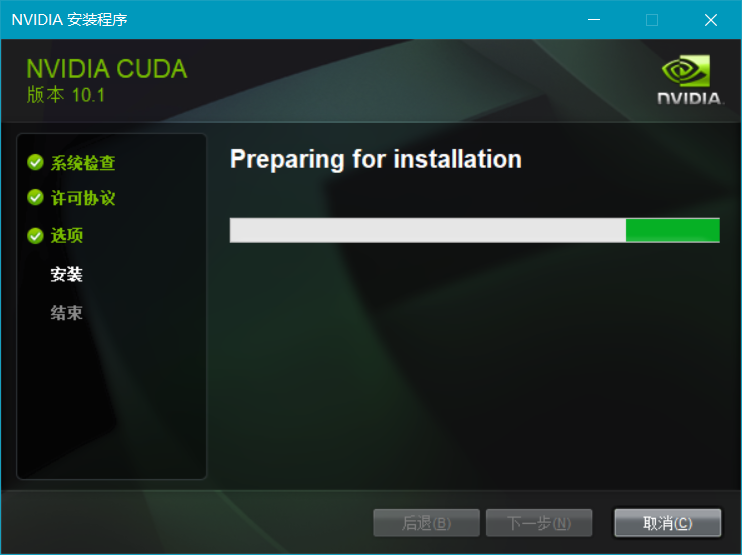
- (5) 安装成功
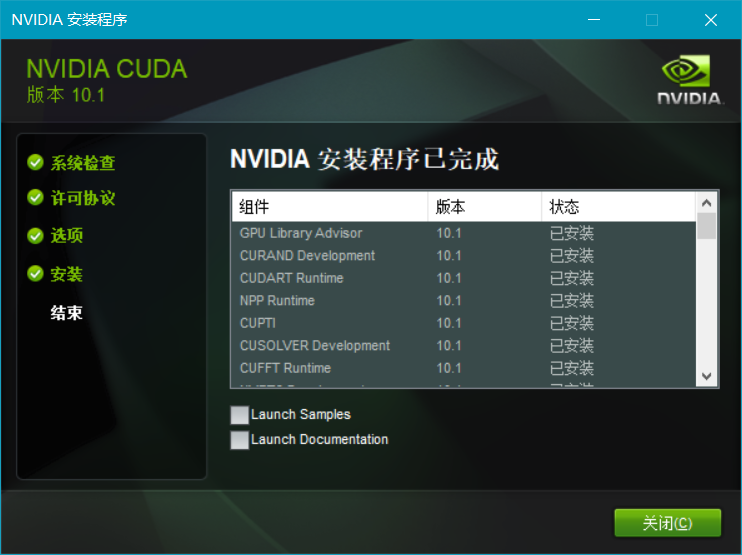
- Launch Samples:
C:\ProgramData\NVIDIA Corporation\CUDA Samples\v10.1
Launch Documents:file:///C:/Program%20Files/NVIDIA%20GPU%20Computing%20Toolkit/CUDA/v10.1/doc/html/index.html - (6) 验证安装成功
- (6a) 环境变量应该已经自动加载好了
即系统变量中的CUDA_PATH,CUDA_PATH_v10_1 - (6b) cmd 里查看版本信息,
nvcc -V, 得到release 10.1, V10.1.105
使用 CUDA 10.1 Update 2 会得到Cuda compilation tools, release 10.1, V10.1.243 - (6c) 进入到路径下后查看GPU运行时的监测界面
此时提示'nvidia-smi' 不是内部或外部命令,也不是可运行的程序或批处理文件。
说明需要修改环境变量,见上,修改系统环境变量 Path 后可能需要重启才能生效
- (6a) 环境变量应该已经自动加载好了
2. 安装 cuDNN
cuDNN 称不上安装,只需要将下载下来的压缩包解压后,将对应文件夹的文件放到 CUDA 安装路径下的对应文件夹里即可
系统环境变量
- 删掉
CUDA_BIN_PATH:%CUDA_PATH%\bin - 删掉
CUDA_LIB_PATH:%CUDA_PATH%\lib\x64 - 发现/保留
CUDA_PATH:C:\Program Files\NVIDIA GPU Computing Toolkit\CUDA\v10.1 - 发现/保留
CUDA_PATH:C:\Program Files\NVIDIA GPU Computing Toolkit\CUDA\v10.1 - 发现/保留
DriverData:C:\Windows\System32\Drivers\DriverData - 删除
CUDA_SDK_BIN_PATH:%CUDA_SDK_PATH%\bin\win64 - 删除
CUDA_SDK_LIB_PATH:%CUDA_SDK_PATH%\common\lib\x64 - 删除
CUDA_SDK_PATH:C:\ProgramData\NVIDIA Corporation\CUDA Samples\v10.0 - 发现/保留
NUMBER_OF_PROCESSORS:4//20on desktop - 发现/保留
NVCUDASAMPLES_ROOT:C:\ProgramData\NVIDIA Corporation\CUDA Samples\v10.1 - 发现/保留
NVCUDASAMPLES10_1_ROOT:C:\ProgramData\NVIDIA Corporation\CUDA Samples\v10.1 - 仅台式机
NVTOOLSEXT_PATH:C:\Program Files\NVIDIA Corporation\NvToolsExt\
系统环境变量 Path - 发现/保留
C:\Program Files\NVIDIA GPU Computing Toolkit\CUDA\v10.1\bin - 发现/保留
C:\Program Files\NVIDIA GPU Computing Toolkit\CUDA\v10.1\libnvvp - 删除
C:\Program Files\NVIDIA GPU Computing Toolkit\CUDA\v9.0\lib\x64 - 删除
C:\Program Files\NVIDIA GPU Computing Toolkit\CUDA\v9.0\common\lib\x64 - 发现/保留
C:\Program Files (x86)\NVIDIA Corporation\PhysX\Common - 笔记本增加
C:\Program Files\NVIDIA Corporation\NVIDIA NvDLISR - 发现/保留
C:\Program Files\NVIDIA Corporation\Nsight Compute 2019.4.0\
发现还是没有解决,于是在系统变量 Path 中
- 增加
C:\Program Files\NVIDIA Corporation\NVSMI - 重启系统后生效
找到 CUDA 的安装路径,即 C:\Program Files\NVIDIA GPU Computing Toolkit\CUDA\v10.1
cuDNN 解压后是一个文件夹,即 cuda,把里面的三个文件夹和一个文件分别移动到对应位置即可
ImageNet 2012
1 | wget <imagenet-url> |
ImageNet 2010
- Connection 7 finished
Downloaded 123.9 Gigabyte in 35:37:10 hour(s). (1013.31 KB/s) - Connection 0 finished
Downloaded 5.0 Gigabyte in 7:08:54 hour(s). (204.80 KB/s) - Connection 8 finished
Downloaded 15.3 Gigabyte in 9:12:42 hour(s). (483.26 KB/s)
ImageNet 2012
- Connection 7 finished
Download 137.7 Gigabyte in 45:10:02 hour(s). (888.25 KB/s) - Connection 1 finished
Download 6.3 Gigabyte in 9:23:27 hour(s). (194.83 KB/s) - Connection 8 finished
Download 12.7 Gigabyte in 17:01:50 hour(s). (217.99 KB/s) - Downloaded
- ILSVRC2012_img_test_v10102019.tar
- ILSVRC2012_img_val.tar
- ILSVRC2012_img_train.tar
1 | cd GitHubLab # ls |
Search Refs
Win10中CUDA、cuDNN的安装与卸载
cuda win 卸载后重启
Win10卸载原有CUDA+安装新CUDA+cudnn
win10 Nvidia CUDA 安装与再安装
win适用 cuda版本
Windows系统下安装多个版本cuda、cudnn,以及切换使用
cuda 补丁 安装 win
Windows版本CUDA、CUDNN与英伟达驱动安装教程
windows 查看 cuda cudnn 版本
查看cuda和cudnn版本win&linux
Linux 和 Windows 查看 CUDA 和 cuDNN 版本
Windows 系统查看 CUDA 和 cuDNN 版本
nvidia-smi 不是内部或外部命令
成功解决 nvidia-smi 不是内部或外部命令 也不是可运行的程序 或批处理文件
windows下直接输入nvidia-smi显示不是内部或外部命令也不是可运行的程序
tensorflow 2.1, win, ImportError: DLL load failed: 找不到指定的模块。
Win10 安装 TensorFlow 2.1 出现 ImportError: DLL load failed 问题的解决
TensorFlow 2.1: ImportError: DLL load failed: The specified module could not be found.
The latest supported Visual C++ downloads
安装TensorFlow后ImportError: DLL load failed: 找不到指定的模块。
Adding visible gpu devices: 0
[tensorflow-gpu运行测试代码,卡在 I tensorflow/core/common_runtime/gpu/gpu_device.cc:1512] Adding visible gpu](https://blog.csdn.net/Msjiangmei/article/details/90695696)
Bug: tensorflow-gpu takes long time before beginning to compute
Ubuntu 安装多版本 CUDA
准备
Ubuntu 查看版本信息 ref
1 | cat /proc/version |
- proc 目录下记录的当前系统运行的各种数据,包括 gcc 版本
- 显示 linux 的内核版本和系统是多少位的,”X86_64” 代表系统是 64 位
- 显示信息
- Distributor ID: 类别是 Ubuntu
- Description: 16年3月发布的稳定版本,LTS代表 Long Term Support 长时间支持
- Release: 发行日期或者是发行版本号
- Codename: ubuntu 的代号名称
1 | cd Software |
nvidia-smi type什么意思
What do G and C types mean in nvidia-smi?
- They are both for GPU
- C = compute = CUDA or OpenCL
- G = graphics = DirectX or OpenGL
- C = Compute, which defines the processes that use the compute mode of Nvidia GPUs which use CUDA libraries, used in deep learning training and inferencing using Tensorflow-GPU, Pytorch, etc
- G = Graphics, which defines the processes that use the graphics mode of Nvidia GPUs used by professional 3D graphics, gnome-shell (Ubuntu’s GUI environment), Games, etc for the rendering of graphics or videos
- C+G = Compute + Graphics, which defines the processes that use both the contexts defined above.
wget 加速
Linux下载加速,比Wget好太多了(CentOS、Debain都有)
- 安装 yum-axelget 插件,安装该插件后,yum会使用多线程下载。
1
yum -y install yum-axelget
- 安装后可以使用axel进行并行下载,使用例子如下
1
axel -a -n 10 <url-of-the-file-to-be-downloaded>
- 使用参数
- 一般使用:axel url(下载文件地址);
- 限速使用:加上 -s 参数,如 -s 10240,即每秒下载的字节数,这里是 10 Kb;
- 限制连接数:加上 -n 参数,如 -n 10,即打开10个连接。
- 更改默认线程数
- 设置线程数为32线程,或者设置成更多(默认为10线程)
1
vim /usr/lib/yum-plugins/axelget.py
- 修改如下,将10改为32,两个位置:
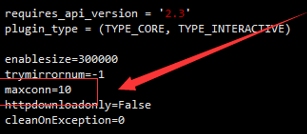
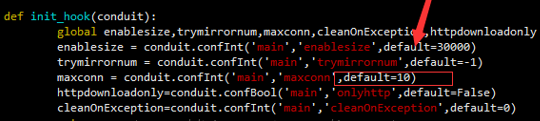
- 设置线程数为32线程,或者设置成更多(默认为10线程)
下载
1 | cd ~/Software |
- cuda_10.1.105_418.39_linux.run
- cudnn-10.1-linux-x64-v7.6.5.32.tgz
perf 工具: 安装后有助于缓和 ps 的延迟, 就 ps 和 top 慢
scp 使用
Linux scp命令
scp 跨机远程拷贝
1 | scp -P 9019 remote@www.runoob.com:/usr/local/sin.sh /home/administrator |
安装
1 | cd ~/Software |
1 | cd ~/Software |
失败
1 | ls /tmp/ | grep cuda |
注意 LD_LIBRARY_PATH 不能写成 .../cuda-10.1/lib64/
1 | cd ~/Software |
1 | # self added for Nvidia |
成功
1 | cd Software |
cublas for 10.1 is missing
Cannot convert Tensorflow protobuf to uff
Anaconda site-packages
Succeed
PyPI 安装包
切换conda源
切换 pip 源:
如果遇到网络问题,可以使用清华大学的镜像:
1 | 设为默认 |
pip下载超时
报错信息为
1 | ReadTimeoutError: HTTPSConnectionPool(host='pypi.tuna.tsinghua.edu.cn', port=443): Read timed out. |
解决之一:
手动换源,注意后面要有 /simple/ 目录
1 | pip install numpy==1.15.1 -i https://pypi.tuna.tsinghua.edu.cn/simple/ |
Refs:
解决pip超时的问题
anaconda清华源可以暂弃了
References
1 | chmod +x ?*.sh |